
Lemon drizzle, pistachio and blood orange, egg-free date – Tarunima Sinha’s spring bakes
Cleverly using just one size of cake tin for all her recipes, the baker and author has come up with a stunning array of beautiful cakes. Here, we pick five of our favourites from her new cookbook
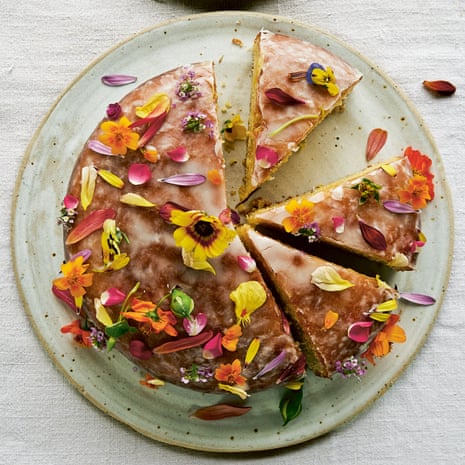
Lemon drizzle cake
Before I moved to the UK, my love for lemons was limited to savoury dishes, lemonade and shikanji, an Indian lemon drink. It wasn’t until 2001 – on the third day of my new life in the UK – that I tried lemon cake. I didn’t know then that it would become my favourite.
When my husband, Amit, and I were staying with my in-laws in Wales, I ordered my first ever lemon cake in a cafe overlooking Harlech Castle. Amit and I were married only the week before, so my hands were still covered with the elaborate wedding henna design. Our waitress was intrigued, and we spoke about India, cakes and the sea. I think she was the first person outside the Indian friend-and-family diaspora I spoke to. That cake was a revelation to me. I now bake some version of a lemon cake almost every week and even grow lemons in my little London garden.
Serves 8
melted butter 100g
double cream 150ml
vanilla extract 1 tsp
lemon juice 3 tbsp
plain flour 250g
baking powder 1½ tsp
salt 1⁄4 tsp
lemons zest of 4
golden caster sugar 300g
eggs 5
For the glaze (optional)
apricot jam 4 tbsp
hot water 2 tbsp
For the drizzle
icing sugar 250g
lemon juice of 1
salt a pinch
Butter and flour a 20cm round cake tin and line the base and sides with baking paper. Preheat the oven to 170C fan/gas mark 5.
Stir together the melted butter, cream, vanilla and lemon juice in a small jug.
Sift the flour, baking powder and salt into a bowl.
Put the lemon zest and caster sugar into a large bowl if using a hand-held whisk, or a stand mixer with a whisk attachment. Rub together using your hands to infuse the sugar with the lemon flavour.
Add the eggs to the lemon-infused sugar and whisk for 4-5 minutes until pale, fluffy and doubled in volume. Slowly pour the melted butter and cream mix into the whisked egg mixture. Fold in gently, taking care not to deflate the batter.
Pour the batter in the prepared tin and tap the tin gently on the worktop to release any air pockets.
Bake for 40 minutes or until the surface is springy to touch and a skewer comes out clean. Remove the cake from the oven and lower the temperature to 150C fan/gas mark 3½.
Cool the cake for 10 minutes in the tin, then gently turn it out on to a wire rack set over a baking tray. If using the glaze, make it by sieving the jam and thinning it with the hot water, then brush it all over the cake and let it set for another 10 minutes.
Meanwhile, make the drizzle by mixing the icing sugar, lemon juice and salt to make an icing of pouring consistency.
Once the apricot glaze is dry to touch, cover the entire cake with the drizzle. Return the cake (still over the baking tray) to the oven for 3 minutes for the drizzle to set. Do keep an eye on the clock and don’t walk away. Timing is important here.
After 3 minutes, take the cake out of the oven and let it cool on the rack completely. Sprinkle with edible flowers to decorate.
NOTE The apricot glaze is optional but I recommend using it, as it helps to lock in the moisture and keep the cake fresh for 3-4 days. Placing the cake back in the oven sets the drizzle to a translucent glaze.
Pistachio and blood orange cake
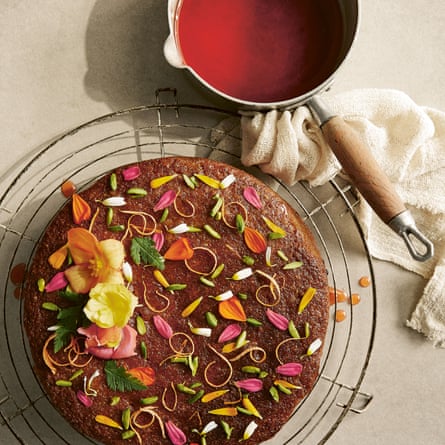
This cake is inspired by the foothills of Mount Etna, where I saw pistachio trees and orange trees growing side by side in the volcanic soil. Blood oranges are mellow, fragrant and sweet, and don’t have the sharp tang of other citrus fruits. There are several varieties but the delicately flavoured moro has a deeper red flesh and its orange skin is speckled with red. Out of season, you can make this with ordinary oranges.
Serves 8
self-raising flour 175g
baking powder 1½ tsp
salt ¼ tsp
green cardamom pods 4-5 , seeds removed and ground to a powder
pistachio nuts 120g, finely ground
eggs 4
butter 175g
golden caster sugar 175g
blood oranges zest of 3, juice reserved for the syrup (see below)
lemon zest of 1, juice reserved for the syrup (see below)
vanilla extract 1 tsp
soured cream 50g
For the syrup
blood oranges juice of 3 (see above)
lemon juice of 1 (see above)
caster sugar the same amount by weight of sugar to juice
sea salt a pinch
For the sugar glaze (optional)
icing sugar 150g, sifted
blood orange juice 3 tbsp
sea salt a pinch
Butter and line a 20cm round cake tin with baking paper. Preheat the oven to 170C fan/gas mark 5.
Sift the flour, baking powder, salt and ground cardamom into a large bowl, then add the ground pistachios.
Break the eggs into a jug. Stir with a fork until just mixed.
Put the butter, sugar, citrus zests and vanilla in another large bowl if using a hand-held beater or use a stand mixer with a beater attachment. Beat on a medium speed for 6-8 minutes or until pale and fluffy.
Add the eggs in 3 or 4 goes, incorporating well after each.
Fold in alternately the sifted dry ingredients and the soured cream in 3 or 4 goes, until just combined to a smooth batter. Do not overmix.
Pour the batter into the prepared tin. Tap the tin gently on the worktop to release any air pockets. Bake for 35-40 minutes. Test by inserting a skewer: it should come out clean. If it isn’t, cover with foil and cook for a further 5-10 minutes.
Meanwhile, make the syrup. Weigh the juice from the fruit, then pour into a small pan over a medium heat. Add an equal weight of sugar and the pinch of salt. Simmer until the sugar dissolves completely and continue to cook for 3-5 minutes until a thin syrup forms – you don’t want it to be thick. Remove from the heat and set aside.
When the cake is baked, leave in the tin to cool for 10 minutes. Then poke holes over the surface with a skewer and brush half the syrup over the top.
After 10 minutes, turn out the cake from the tin and place on a wire rack. Brush the remaining syrup on the sides as well.
Once the cake is cold, mix the ingredients for the glaze, if using, to a pouring consistency. Add the juice sparingly: you may not need all of it. Pour over the cake and, if you wish, add a sprinkle of chopped pistachios and edible flowers.
Coffee and walnut cake
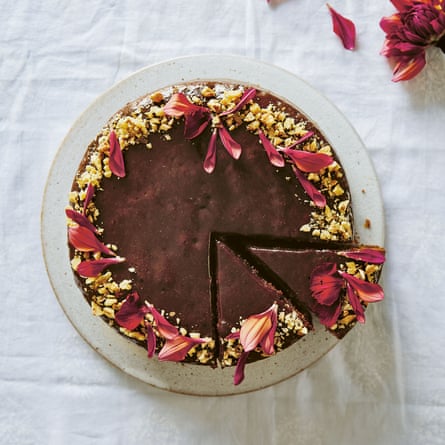
I am a tea lover and it took me some time to warm to the idea of coffee and walnut cake. To my surprise, I really liked the bitterness of the coffee with the crunch of the walnuts. My version includes lightly toasted walnuts, for a more satisfying nutty crunch, and a coffee caramel glaze.
Serves 8
walnuts 150g
self-raising flour 180g, plus an extra 1 tbsp
baking powder 1½ tsp
salt ¼ tsp
instant coffee powder 4 tbsp dissolved in 2 tbsp hot water
soured cream 90ml
butter 180g
golden caster sugar 100g
light muscovado sugar 100g
vanilla extract ½ tsp
eggs 4
For the glaze
light muscovado sugar 100g
double cream 100ml
butter 25g
sea salt ½ tsp
instant coffee powder 2 tbsp
Butter and flour a 20cm round cake tin. Line the base with a disc of baking paper. Preheat the oven to 170C fan/gas mark 5.
Spread the walnuts on an oven tray and roast for 5-7 minutes. Keep an eye on them as they can burn quickly. Allow to cool then chop coarsely, sprinkle with a tablespoonful of flour, mix and set aside.
Sift the flour, baking powder and salt into a bowl.
Mix the dissolved coffee and soured cream in a small jug.
Put the butter, both sugars and the vanilla in a large bowl, if using hand-held beaters, or a stand mixer with a beater attachment. Cream for 6-8 minutes, until pale and fluffy. Add the eggs, one by one, incorporating well after each addition.
Add a third of the flour mixture followed by a third of the coffee and cream mixture, stirring after each addition. Continue to add alternately until everything is incorporated.
Set aside a handful of the chopped walnuts. Add the rest to the batter and gently mix in, then pour it into the prepared cake tin. Tap the tin gently on the worktop to release any air pockets.
Bake for 35-40 minutes or until a skewer comes out clean and the cake is well-risen and springy to touch.
Cool the cake for 10 minutes in the tin then invert on to a wire rack.
While the cake is cooling, make the glaze. Gently warm all the ingredients in a small pan until melted and homogeneous. Keep stirring over a gentle heat for 5 minutes until glossy and smooth. Remove from heat and set aside but keep warm.
Brush the warm cake generously with a couple of coats of the glaze. Sprinkle with the reserved chopped walnuts. Serve with whipped cream and any remaining caramel glaze.
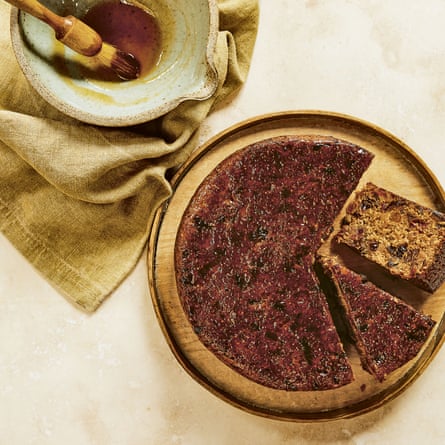
Egg-free date cake
This is based on a recipe I was given by a customer during my cake stall days. She very kindly said that my parents must love my baking.
I said I was not sure: my mother does not eat eggs and I don’t bake much without eggs. To my surprise, she shared a recipe for an old-fashioned, egg-free cake. The original only had soft dates and prunes but I have added other fruits.
Over the years, I have adapted it to my Ma’s liking: it has her seal of approval. It keeps well and no one would guess it is “free-from”. Enjoy it with strong tea or pack it for picnics or long journeys – it keeps really well.
Serves 8
medjool dates 200g, stoned
soft dried figs 150g, stalks removed
soft dried prunes 100g, stoned
dried apricots 100g
currants, dried cranberries or sultanas 100g
orange zest and juice of 1 large
butter 175g
condensed milk 300g
freshly brewed black tea 175ml
plain flour 125g
wholemeal or rye flour 75g
baking powder ½ tsp
bicarbonate of soda ½ tsp
salt ½ tsp
apricot jam 2 tbsp mixed with 2 tbsp boiling water
Oil and flour a 20cm round cake tin. Line the base and sides with a double layer of baking paper. Preheat the oven to 160C fan/gas mark 4.
Chop the dates, figs, prunes and apricots in small pieces. Put in a large bowl along with the currants. Add the orange zest and juice and leave to soak overnight or for at least 6 hours until the fruits have become plump and soaked up all the liquid.
Put the butter, condensed milk, tea and all the soaked fruits in a medium pan over a very gentle heat and simmer for 5 minutes, stirring continuously. Turn off the heat and leave to cool for 10 minutes.
Sift both flours, the baking powder, bicarbonate of soda and salt into another large bowl. Pour in the warm fruit mixture and fold it well using a spatula.
Pour the batter into the prepared tin and level it with the back of a spoon. Tap the tin gently on the worktop to release any air pockets.
Bake for 1 hour or until a skewer comes out clean, the cake is well risen and springy to touch. After 30 minutes, cover the cake with a piece of foil if it is browning too much.
Leave the cake in the tin for 10 minutes, then turn it on a wire rack.
Once slightly cooled, brush the cake all over with the apricot jam mixed with boiling water. Leave to set for a few hours. The texture of the cake improves as it matures over the next few days. Store it in an airtight container for a week, or wrap well and put in the freezer for a few months.
Basque cheesecake with berries
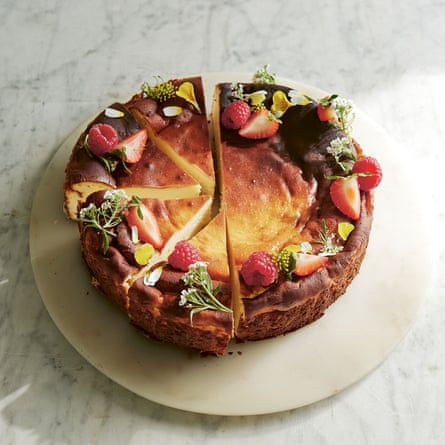
This rich, baked cheesecake has a dark burnt top and, unlike a traditional cheesecake, is made without a crust – which I prefer. This cake needs time, not so much in baking but in chilling in the fridge. This makes it a great bake-ahead dessert. It’s well worth the patience. I like to serve it with seasonal berries and compote.
Serves 8
full-fat cream cheese 550g
soured cream 125g
golden caster sugar 150g
vanilla bean paste 1 tsp
salt ½ tsp
cornflour 40g
eggs 5
double cream 300ml
To serve (optional)
fresh berries or berry compote
Lightly butter a 20cm cake tin. Line the base and sides with two sheets of baking paper, enough to come at least 8cm above the sides of the tin. (This extra paper is required to lift out the cheesecake once baked, and it helps the cheesecake rise during baking.) Preheat the oven to 220C fan/gas mark 9.
Put the cream cheese, soured cream, sugar, vanilla, salt and cornflour in a large bowl if using a hand-held beater, or a stand mixer with the paddle attachment and mix everything together.
Gently whisk the eggs and double cream together in a small jug or bowl using a balloon whisk or fork. With the machine running on low speed, slowly add the egg and cream mixture to the cream cheese mixture. Keep the speed low and stop when everything is well combined. Avoid overmixing, as this would create air bubbles in the cheesecake.
If you see any lumps, or unmixed mixture, you can pass this batter through a large metal sieve.
Pour the cheesecake into the prepared tin. Bake for 10 minutes then lower the temperature to 200C fan/gas mark 7 and bake for a further 40 minutes. You will know when it is done, as the top of the cheesecake will be dark and puffed up. It should still have a slight wobble in the middle, which is important for a creamy texture. Don’t overbake the cheesecake. Do not be alarmed if it sinks a little.
Let it cool in the tin for an hour or two, then place in the fridge and leave overnight.
When ready to serve, use the baking paper to lift the cheesecake out of the tin. Cut into wedges and serve with some berries or berry compote on the side.
Recipes from My Little Cake Tin by Tarunima Sinha (Quadrille, £22), published on 9 May. To order a copy for £19.36 go to guardianbookshop.com. Delivery charges may apply
Source: theguardian.com